The RMI Specification requires that loaded pallet racks be out-of-plumb no more than H/240 where H = the distance from the floor to the top shelf level. To put this in simpler terms this allows for ½” out-of-plumb for every 10’ of height. This limit is for a loaded rack. The actual installation tolerance for plumb should be much tighter because any out-of-plumb on an empty rack will increase once the racks are loaded. The installer should make the racks as plumb as reasonably possible so the final out-of-plumb stays within the RMI limit for the loaded racks. Most installers will want the installed empty rack out-of-plumb to be less than half of the H/240 limit so they are not called back to the site once the rack is loaded.
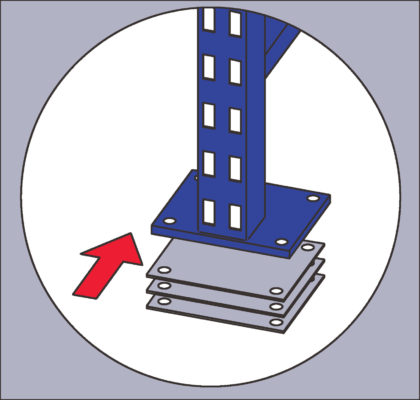
Before attempting to plumb the racks down-aisle the racks should be installed plumb in the cross-aisle direction. This is normally done using shims. Frames with greater aspect ratios (Height-to-depth ratio H/D) will need to have thinner shims to control the top movement of the frame when a shim is added. For example if the aspect ratio of a frame is 6 to 1, a 1/16” shim will move the top of the frame 3/8” (6 x 0.0625”). If a 1/8” shim is used the top of the frame will move twice this much or ¾” (6 x 0.125”). Having only the thicker shim will make it more difficult to plumb the rack. The manufacturer should provide shims that take into account the top movement as it relates to the detail of their row spacer.
When the rack frames are set back-to-back and are to be connected with row spacers the frames are normally set the correct distance from each other at the floor and are normally installed following a chalk line on the floor. In a perfect world that flue space would remain exact for the full height of the two frames. In reality though the flue space may either diminish or increase at higher elevations. This is why the cross-aisle movement of the top of the frames caused by the addition of shims becomes extremely important. A diminishing flue dimension may be caused by a dip in the floor in the flue area.
Some manufacturers make row spacers with slotted holes to allow for minor variation to the flue distance. Other manufacturers will have a row spacer that must fit in between the faces of the two frames at the top. If the flue dimension diminishes it may not be possible to connect the back connector because it will not fit between the faces of the columns at the top. A common installation mistake is to loosen the anchors and pound in the back connector. Doing this can actually cause the column at the flue to no longer be in firm contact with the floor. (See Figure A below). When this happens things may be fine until the racks are loaded. Once the racks are loaded the columns in the flue are forced downward and the frames may compress and buckle the top row spacers in the down-aisle direction which can force the racks out-of-plumb down aisle (see figure B below). To prevent this it is actually better if the flue dimension at the top is either the same as it is at the bottom or slightly greater, rather than slightly less. The back connector at the top should easily fit (with all columns in firm contact with the floor) and not have to be forced in.

A good procedure to prevent this from occurring would be:
1) Set up two rows without row spacers.
2) Properly shim to cross-aisle plumb so flue dimension at top is greater than or equal to flue dimension at the bottom and top back connector installs easily with all posts of rack frames in firm contact with the floor (Tighten anchors to ensure)..
3) Down-aisle plumb the rack after the cross-aisle plumb is complete.
4) Install back connectors.
Rather than purchasing (1) shim per frame that may be 1/8” thick it is wise to purchase (1) shim 1/16” thick and (1) shim 1/32” thick to give the installer more ability to “fine-tune” cross-aisle plumb. If the floor is suspect thicker shims can be purchased as needed.
